|
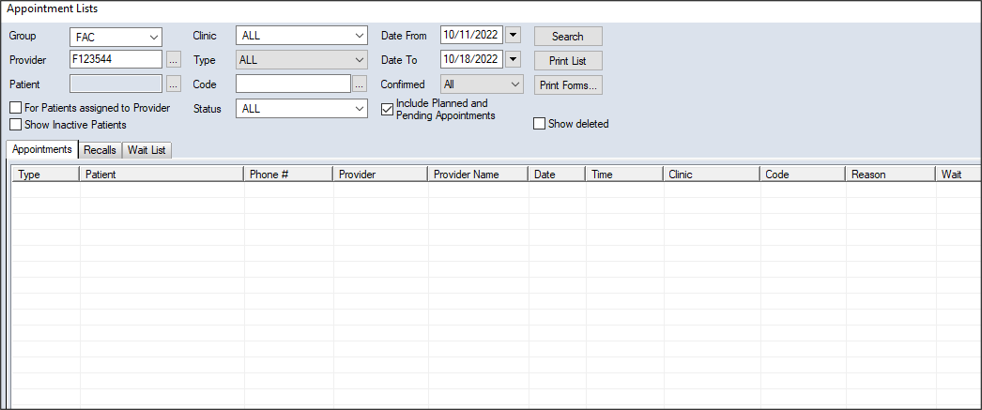
The Appointment Lists window offers three tabs to allow you to easily manage patient appointments, including recall reminders and wait listed appointments:
-
Appointments tab: Allows you to search for appointments matching the criteria specified. Once found, you can perform a variety of other tasks related to appointments that include scheduling, modifying, and adding notes and treatments, etc.
-
Recalls tab: Allows you to search for recall reminders matching the criteria specified. Once found, you can perform several tasks that include modifying recall reminders and requesting or creating appointments for a recall reminder.
Important: Recall reminders are not considered appointments.
Some institutions may configure axiUm to group together recall reminders from various classifications when they occur within a specific time.
Example: If a patient has a recall reminder for a hygiene appointment on June 6, and a recall for an endo procedure on June 15, you can book the two recall reminders in the same appointment, eliminating the need for multiple visits by the patient.
Note: Grouped recall reminders in an appointment display a recall chain icon.
-
Wait List tab: Allows you to search for waitlisted appointments matching the criteria specified. Once found, you can perform a variety of other tasks related to waitlisted appointments that include scheduling, modifying, and adding notes and treatments, etc.
Tip: You can also open the Wait List tab directly from the Active tab to fill an open appointment time using the wait list.
To manage Scheduler lists:
-
Open the Scheduler module and click the Lists ( ) icon to display the Appointment Lists window. ) icon to display the Appointment Lists window.
-
Click the Appointments, Recalls, or Wait List tab as necessary.
-
Search for appointments, recalls, or waitlisted appointments.
-
Complete the fields as necessary and click Search.
 Appointment Lists Fields Appointment Lists Fields
Note: Some fields are only available from specific tabs.
| Group |
Select a provider group from the drop-down list.
|
| Provider |
Click the ellipsis to display the Providers List window and select a provider.
|
| Patient |
Note: This field only displays if the Appointments or Recalls tab is selected.
Click the ellipsis to display the Select Patient window and select a patient.
|
|
Clinic |
Select a clinic or ALL from the drop-down list.
Note: This drop-down list is disabled if you are using the Wait List tab in Appointment Fill mode.
|
| Type |
Select the appointment type from the drop-down list.
Note: The options in the list are hard-coded and cannot be changed.
|
| Code |
Note: This field only displays if the Appointments or Recalls tab is selected.
Click the ellipsis to display the Appointment Code or Recall Codes window and select an appointment or recall reminder code.
|
| Reason |
Note: This field only displays if the Wait List tab is selected.
Select a wait reason from the drop-down list.
|
| Status |
Note: This field only displays if the Appointments or Recalls tab is selected.
Select an appointment status from the drop-down list.
|
| Priority |
Note: This field only displays if the Wait List tab is selected.
This field is used for internal purposes and indicates a numeric ranking of an appointment’s importance that can be used to make cancellation decisions when chairs are limited.
It defaults to the value indicated in the Wait List Reasons window > Default Priority field.
|
| For Patients assigned to Provider |
Note: This field only displays if the Appointments or Recalls tab is selected and is only enabled if the Provider field displays a provider.
Select the checkbox to indicate that only records with patients assigned to the selected provider will be included in the search.
|
| Show Inactive Patients |
Select the checkbox to include inactive patients in the search.
|
| Date From / Date To |
Note: These fields only display if the Appointments or Recalls tab is selected.
Select the start/end dates of a date range from the drop-down calendar.
|
| Confirmed |
Note: This field only displays if the Appointments or Recalls tab is selected.
Select a confirmation status from the drop-down list.
Note: The options in the list are hard-coded and cannot be changed.
|
| Include Planned and Pending Appointments |
Note: This field only displays if the Appointments tab is selected.
Select the checkbox to include planned and pending appointments in the search.
|
| Show Only Active |
Note: This field only displays if the Recalls tab is selected.
Select the checkbox to include only active appointments in the search.
|
| Show deleted |
Note: This field only displays if the Appointments or Recalls tab is selected.
Select the checkbox to include deleted appointments in the search.
|
| Show grouped |
Note: This field only displays if the Recalls tab is selected.
Select the checkbox to include grouped recalls in the search.
|
-
Review the list and complete any of the following to work with the appointment or recall as necessary.
Appointments Tab Tasks
Select Patients
-
Right-click an appointment and select Select Patient.
Note: This selects the patient for all of axiUm. For more ways to select patients, see Select Patients.
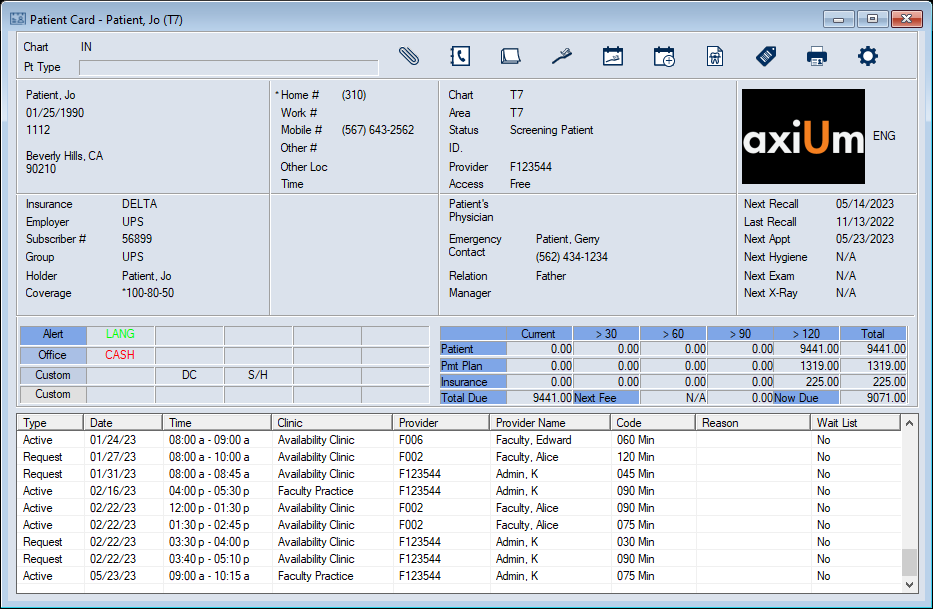
View the Patient Card
-
Right-click an appointment and select Patient Card… to display the Patient Card window.
Tip: In some places, the right-click option displays as Patient Card.
-
Review as necessary.
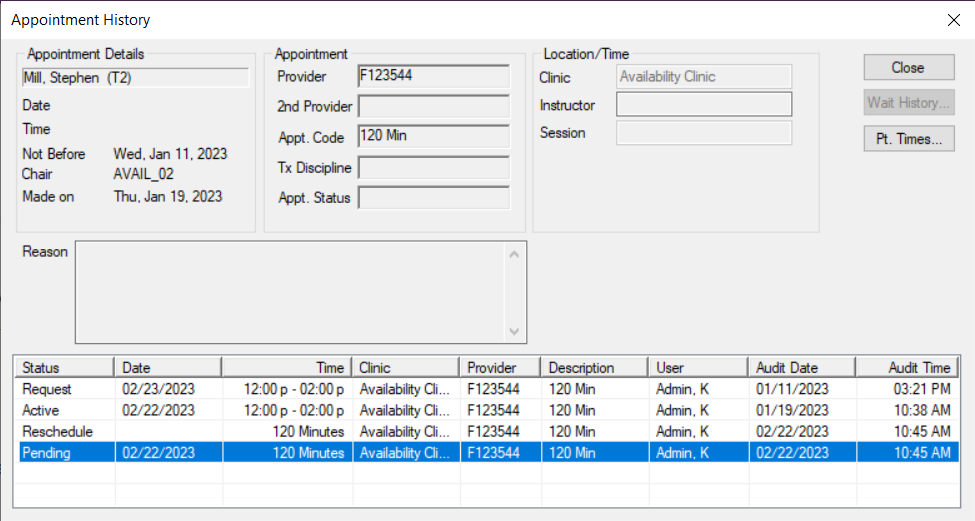
View Appointment History
-
Right-click an appointment and select Show History to display the Appointment History window.
-
Select a listed record and review the information as necessary.
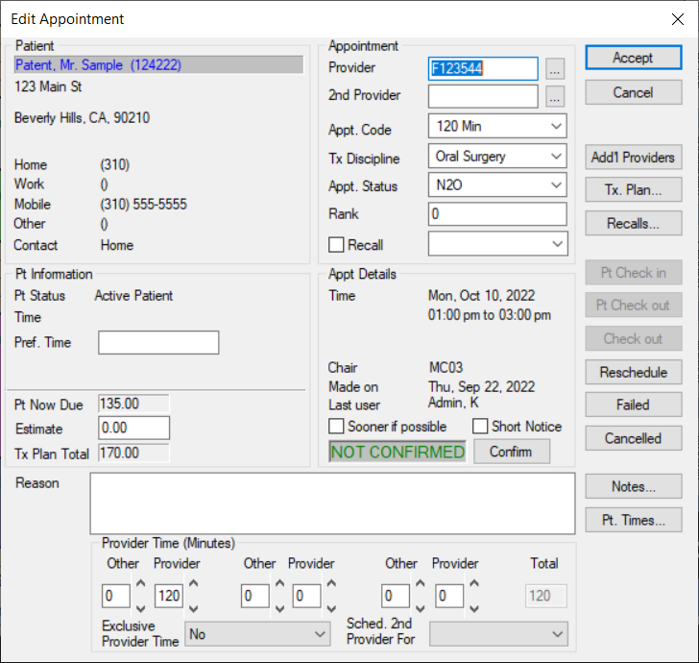
Schedule Appointments
-
Right-click an appointment and select Schedule to display as a yellow floating appointment and drag to an open spot in the schedule.
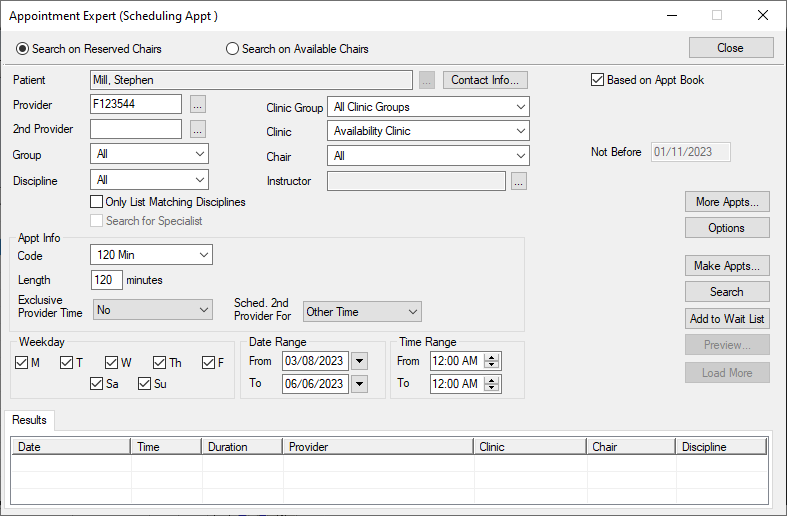
Schedule with Appointment Expert
The Appointment Expert allows you to search for available times in the Scheduler and book appointments.
-
Right-click an appointment and select Schedule with Expert… to display the Appointment Expert (Scheduling Appt) window.
-
Complete the fields as necessary and click Search.
- Review the listed entries.
-
Select a listed appointment date/time and click Make Appts….
-
Click and drag the yellow floating appointment to the empty time block in the Active tab and double-click the area.
Change to Appointment Request
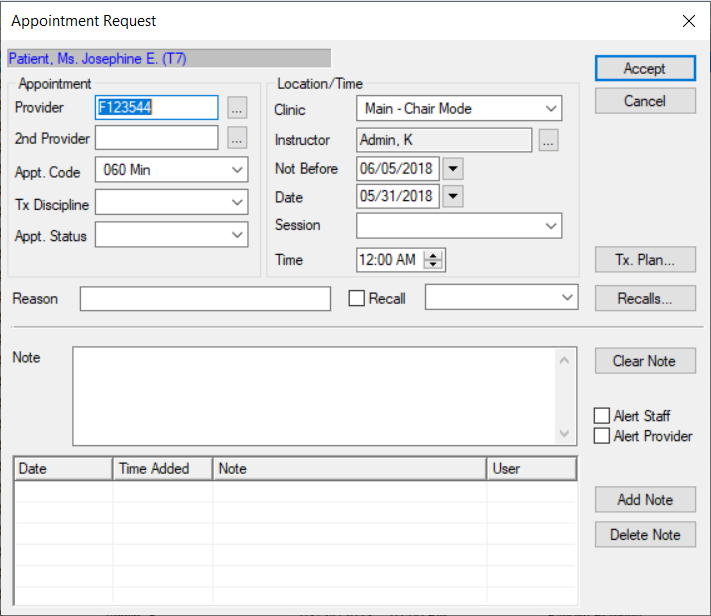
When necessary, you can change a planned appointment into an appointment request.
-
Right-click an appointment and select Change to Request to display the Appointment Request window.
-
Complete the fields as necessary and click OK.
Sign In/Check In Patients
-
Complete one of the following:
-
To sign in a patient and display the Patient Arrival report, right-click an appointment and select Patient Sign In.
The patient’s name displays in purple text to indicate they are signed in and a blue Patient Arrival indicator displays on the provider’s status bar:
-
To check in a patient and display the Patient Check In Form, right-click an appointment and select Patient Check In.
The patient’s name displays in red text to indicate they are checked in to a clinic.
Check Out Patients
-
Right-click an appointment and select Patient Check Out.
The patient’s name displays in the Scheduler in gray text to indicate they are checked out of the clinic.
Tip: If checked out by mistake, right-click the appointment and select Undo Patient Check Out.
Seat Patients
-
Right-click an appointment and select Patient Seated to set the appointment status to patient seated.
The appointment text displays in black text to indicate the patient is seated in the clinic.
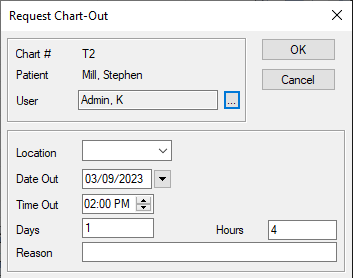
Request Charts
Chart requests control access to paper charts so only one person may use a chart at one time. In most cases, an automatic chart request is sent when the appointment is scheduled, but you can make manual chart requests when necessary.
-
Right-click an appointment and select Chart Request to display the Request Chart-Out window.
Note: If the patient has an electronic chart, a prompt displays. Click Yes to display the Request Chart-Out window.
-
Record the time, location, and reason needed and click OK.
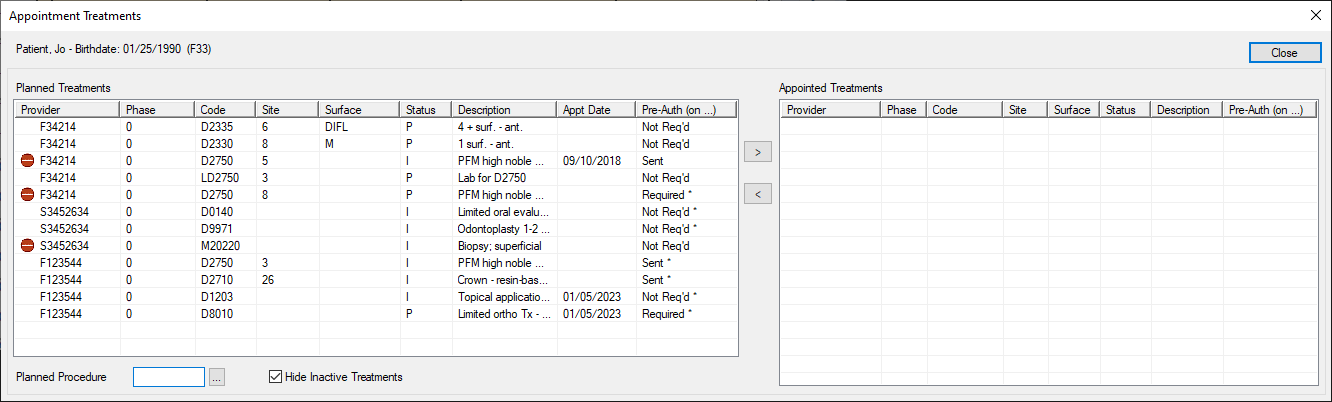
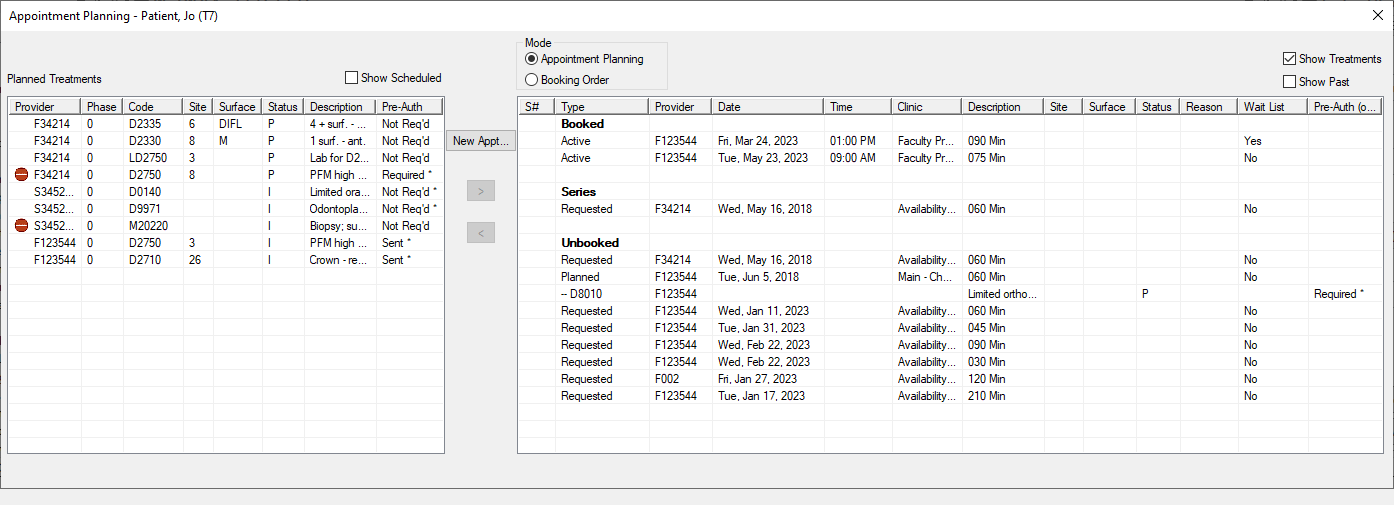
Add Planned Treatments to Appointments
-
Right-click an appointment and select Appointment Treatments to display the Appointment Treatments window.
Note: Only approved planned treatments display.
-
To add planned treatment(s) to the appointment, select the listed treatment(s) and click the > button to move to the Appointed Treatments pane.
-
Click Close.
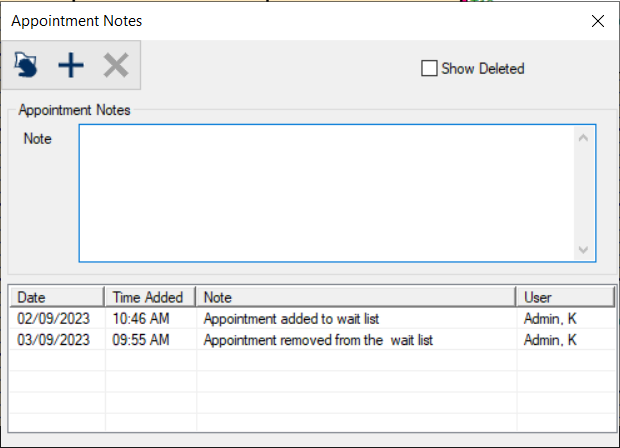
Manage Appointment Notes
-
Right-click an appointment and select Notes to display the Appointment Notes window.
-
To add a note, enter the note text and click the Add a new Record ( ) icon. ) icon.
-
To delete a note, select a listed note and click the Delete Record ( ) icon. ) icon.
Reschedule Appointments
-
Right-click an appointment and select Reschedule to display as a yellow floating appointment and drag to an open spot in the schedule.
Confirm Appointments
-
After contacting the patient, right-click the appointment and select Confirm.
The appointment text displays in blue to indicate that the appointment is confirmed.
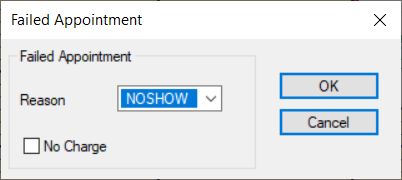
Fail Appointments
An appointment can be failed when the patient does not arrive for the appointment and did not provide cancellation notice.
-
Right-click an appointment and select Fail to display the Failed Appointment window.
-
Complete the fields as necessary and click OK.
Delete Appointments
In rare cases, you may need to delete an appointment.
Important: There are many other ways to modify inaccurate appointments. Whenever possible, we recommend you edit or cancel the appointment as necessary.
-
Right-click an appointment and select Delete.
-
When prompted, click Yes to confirm your deletion.
Edit X-Ray Info
X-ray technicians often need to add details about x-rays taken for the selected patient. Other providers can view those x-rays and details.
-
Right-click an appointment and select Edit X-Ray Info to display the X-Ray Information window.
Note: This option is only enabled if the appointment is a hygiene type appointment code.
Tip: The window only displays if the appointment is today or a future date. The window cannot display if the appointment is past and the X-Rays Taken checkbox is deselected.
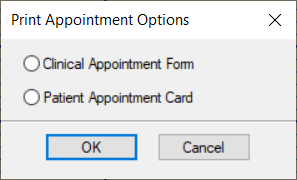
Print Appointment Forms
-
Right-click an appointment and select Print Appt Form to display the Print Appointment Options window.
Tip: You can also click the Print Forms... button to display the Print Appointment Options window.
-
Select one of the following and click OK:
Recalls Tab Tasks
Book Recall Appointments
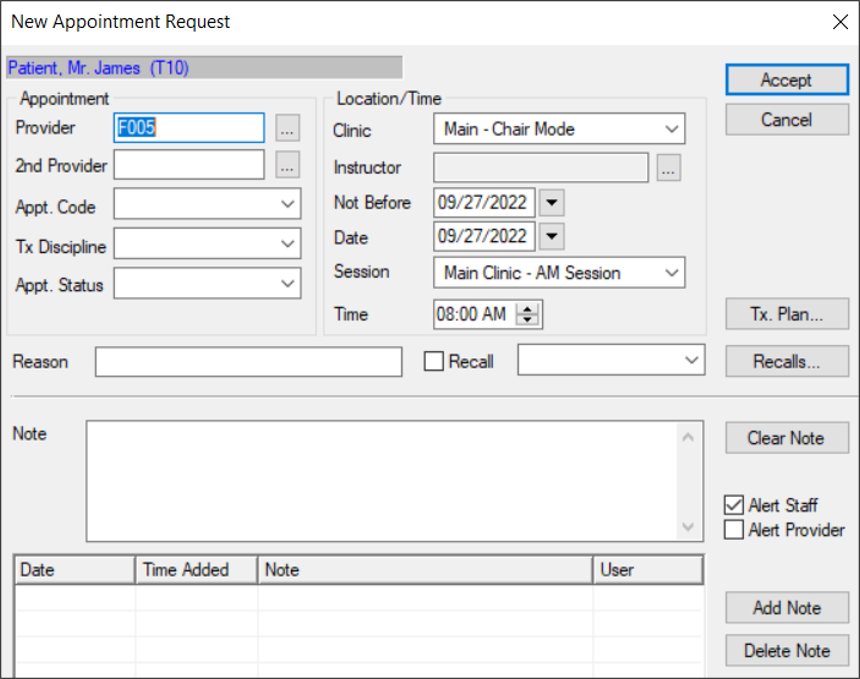
Depending on your institution's workflow, you can schedule an appointment from a recall reminder and associate the recall reminder directly with the appointment.
-
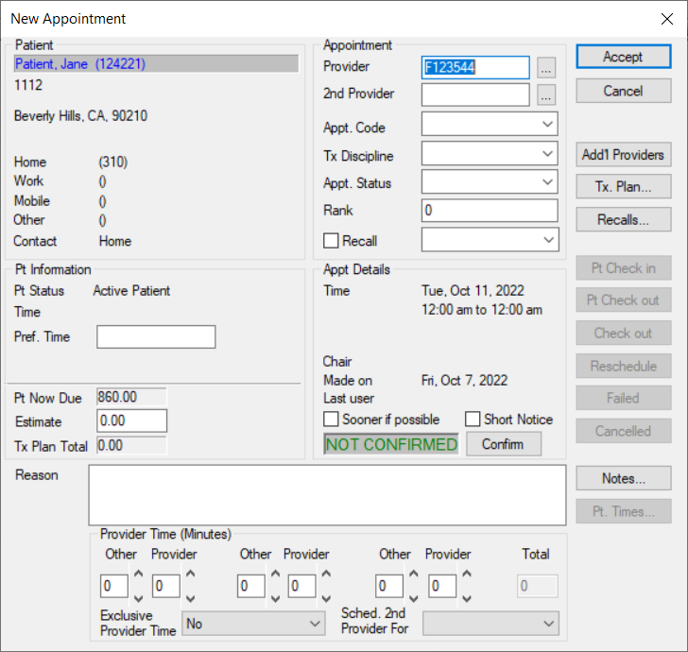
Right-click a recall reminder and select Make appointment… to display the New Appointment window.
Tip: You can also select grouped recalls.
-
Complete the fields as necessary and click Accept.
Tips:
-
The selected recall is automatically associated with the appointment and displays in the Recalls field.
-
To edit the recall information, click Recalls....
Select Patients
-
Right-click a recall reminder and select Select Patient.
Note: This selects the patient for all of axiUm. For more ways to select patients, see Select Patients.
View the Patient Card
-
Right-click a recall reminder and select Patient Card… to display the Patient Card window.
Tip: In some places, the right-click option displays as Patient Card.
-
Review as necessary.
View the Patient Info
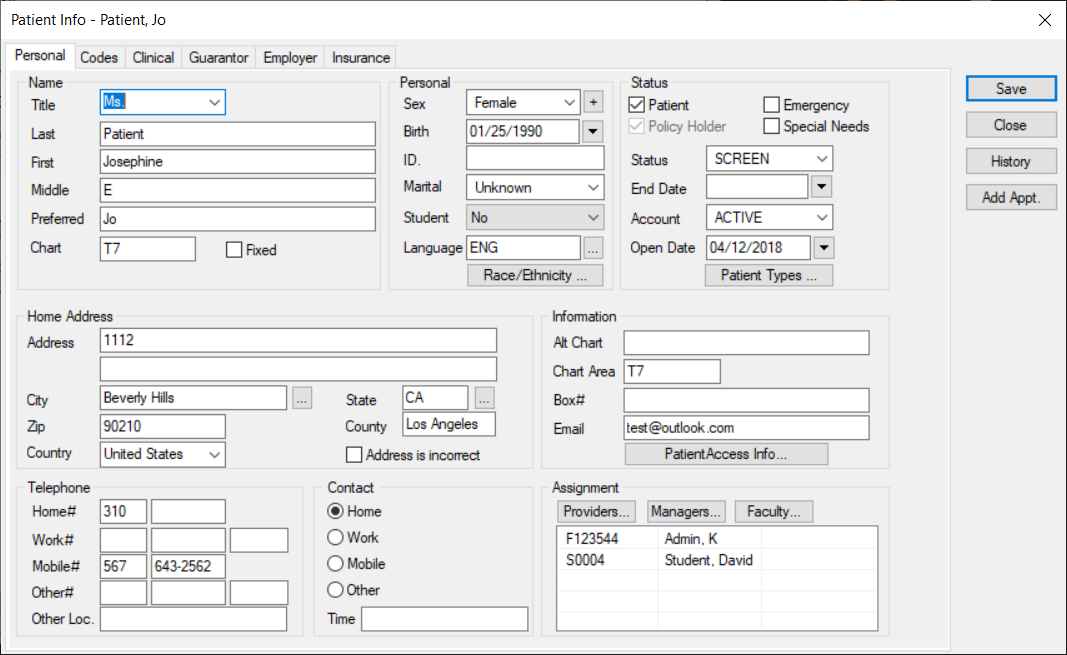
-
Right-click a recall reminder and select Patient Info… to display the Patient Info window.
-
Review as necessary.
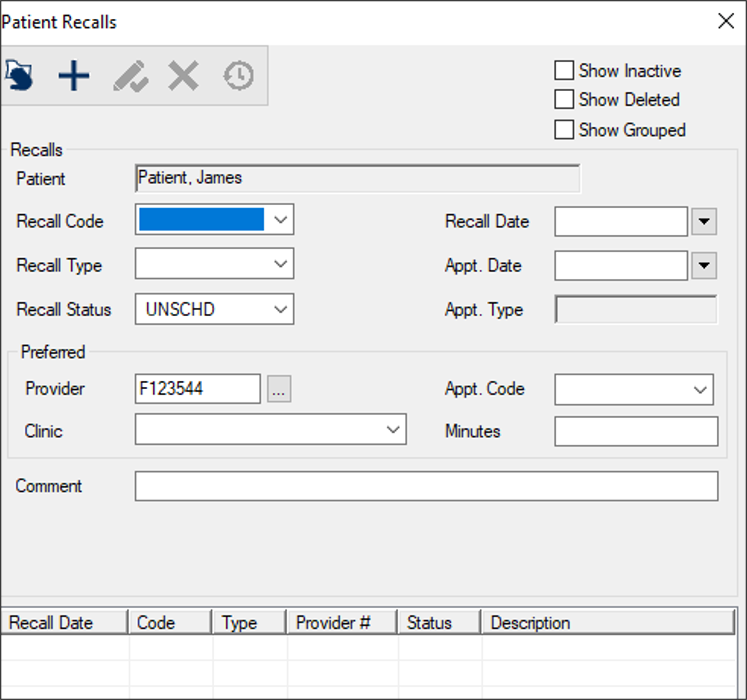
Modify Recalls
-
Right-click a recall reminder and select Edit Recall… to display the Patient Recalls window.
-
Select the listed recall.
-
Modify the fields as necessary and click the Modify Record ( ) icon. ) icon.
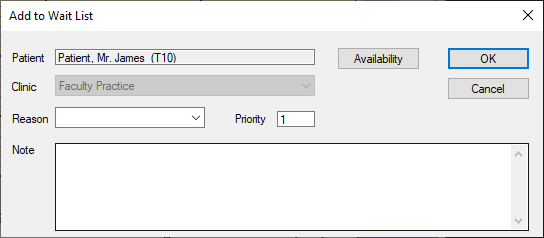
Wait List Tab Tasks
Select Patients
-
Right-click an appointment and select Select Patient.
Note: This selects the patient for all of axiUm. For more ways to select patients, see Select Patients.
View Appointment History
-
Right-click an appointment and select Show History to display the Appointment History window.
-
Select a listed record and review the information as necessary.
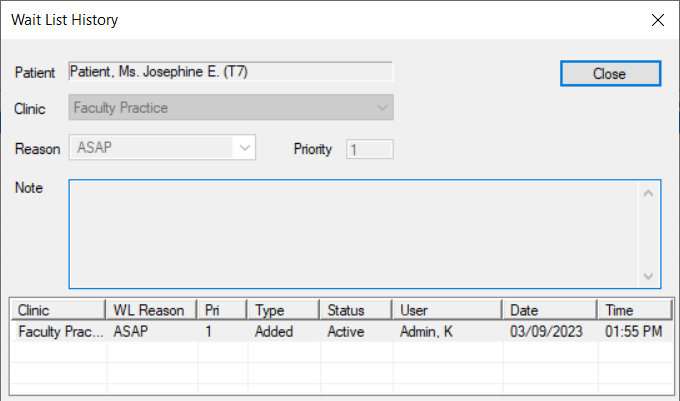
View Wait List History
-
Right-click an appointment and select Show Wait List History to display the Wait List History window.
-
Select a listed record and review the information as necessary.
View the Patient Card
-
Right-click an appointment and select Patient Card… to display the Patient Card window.
Tip: In some places, the right-click option displays as Patient Card.
-
Review as necessary.
Schedule Appointments
-
Right-click an appointment and select Schedule to display as a yellow floating appointment and drag to an open spot in the schedule.
Schedule with Appointment Expert
The Appointment Expert allows you to search for available times in the Scheduler and book appointments.
-
Right-click an appointment and select Schedule with Expert… to display the Appointment Expert (Scheduling Appt) window.
-
Complete the fields as necessary and click Search.
- Review the listed entries.
-
Select a listed appointment date/time and click Make Appts….
-
Click and drag the yellow floating appointment to the empty time block in the Active tab and double-click the area.
Change to Appointment Request
When necessary, you can change a planned appointment into an appointment request.
-
Right-click an appointment and select Change to Request to display the Appointment Request window.
-
Complete the fields as necessary and click OK.
Request Charts
Chart requests control access to paper charts so only one person may use a chart at one time. In most cases, an automatic chart request is sent when the appointment is scheduled, but you can make manual chart requests when necessary.
-
Right-click an appointment and select Chart Request to display the Request Chart-Out window.
Note: If the patient has an electronic chart, a prompt displays. Click Yes to display the Request Chart-Out window.
-
Record the time, location, and reason needed and click OK.
Add Planned Treatments to Appointments
-
Right-click an appointment and select Appointment Treatments to display the Appointment Treatments window.
Note: Only approved planned treatments display.
-
To add planned treatment(s) to the appointment, select the listed treatment(s) and click the > button to move to the Appointed Treatments pane.
-
Click Close.
Manage Appointment Notes
-
Right-click an appointment and select Notes to display the Appointment Notes window.
-
To add a note, enter the note text and click the Add a new Record () icon.
-
To delete a note, select a listed note and click the Delete Record () icon.
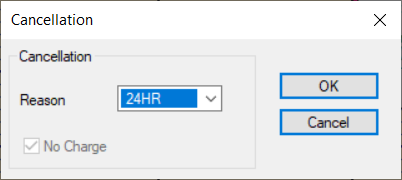
Cancel Appointments
-
Right-click an appointment and select Cancel to display the Cancellation window.
-
Complete the fields as necessary and click OK.
Tip: If cancelled by mistake, right-click the appointment and select Undo Cancel/Fail.
Fail Appointments
An appointment can be failed when the patient does not arrive for the appointment and did not provide cancellation notice.
-
Right-click an appointment and select Fail to display the Failed Appointment window.
-
Complete the fields as necessary and click OK.
Tip: If failed by mistake, right-click the appointment and select Undo Cancel/Fail.
Delete Appointments
In rare cases, you may need to delete an appointment.
Important: There are many other ways to modify inaccurate appointments. Whenever possible, we recommend you edit or cancel the appointment as necessary.
-
Right-click an appointment and select Delete.
-
When prompted, click Yes to confirm your deletion.
Print Appointment Forms
-
Right-click an appointment and select Print Appt Form to display the Print Appointment Options window.
Tip: You can also click the Print Forms... button to display the Print Appointment Options window.
-
Select one of the following and click OK:
|